I recently bought some stepper motors from Sparkfun. I have two others floating around somewhere – they are of the NEMA-17 type (which specifies the face and shaft dimensions and mounting holes.) Mine are m-3 instead of 4-40 mounting holes, but otherwise standard.
I’ve often longed to do something with these motors – to build tools which can build better tools. My initial attempts to build motion stages involved buying stock parts from McMaster and attempting to 3d print all the connecting parts with a Makerbot Replicator 2X. Unfortunately the 3d printer has only about 0.04 inch accuracy, which isn’t enough to make motion stages that won’t bind, even when just aligning steel rods.
In my quest to become able to build serious tools, I’ve acquired a machine shop. I’m still not sure quite how to “climb the tech tree” from poor tools to better ones (more accurate, more precise). How *did* we get from hand tools to the bridgeport? How do you make something more accurate with something less accurate?
(edit, in response to the comment below: Since trying to build my first stages, I have done a little research on some of the steps in this process. I think one of the first ones involved Maudsley in England creating a lead screw using a self-propelled inclined knife on a flat slide climbing against a brass-rod workpiece. Also the Whitworth grinding proceess (which I’ve used myself on 3 pieces of steel – incredibly tedious) to get flat planes. That gave him a master leadscrew which eventually gave him a lathe, which gave some degree of positioning accuracy. I’m not surprised to see interferometry in there. Still haven’t read up on how they managed squareness. I’ll have to watch more of Dan Gelbart’s videos, since he’s been through the process I’ll eventually want to go through.)
Anyway, step 1 would be to build some motion stages so that I can build a CNC thing. (I’m thinking small, high-RPM/low tool force carbide bit CNC mill or something…)
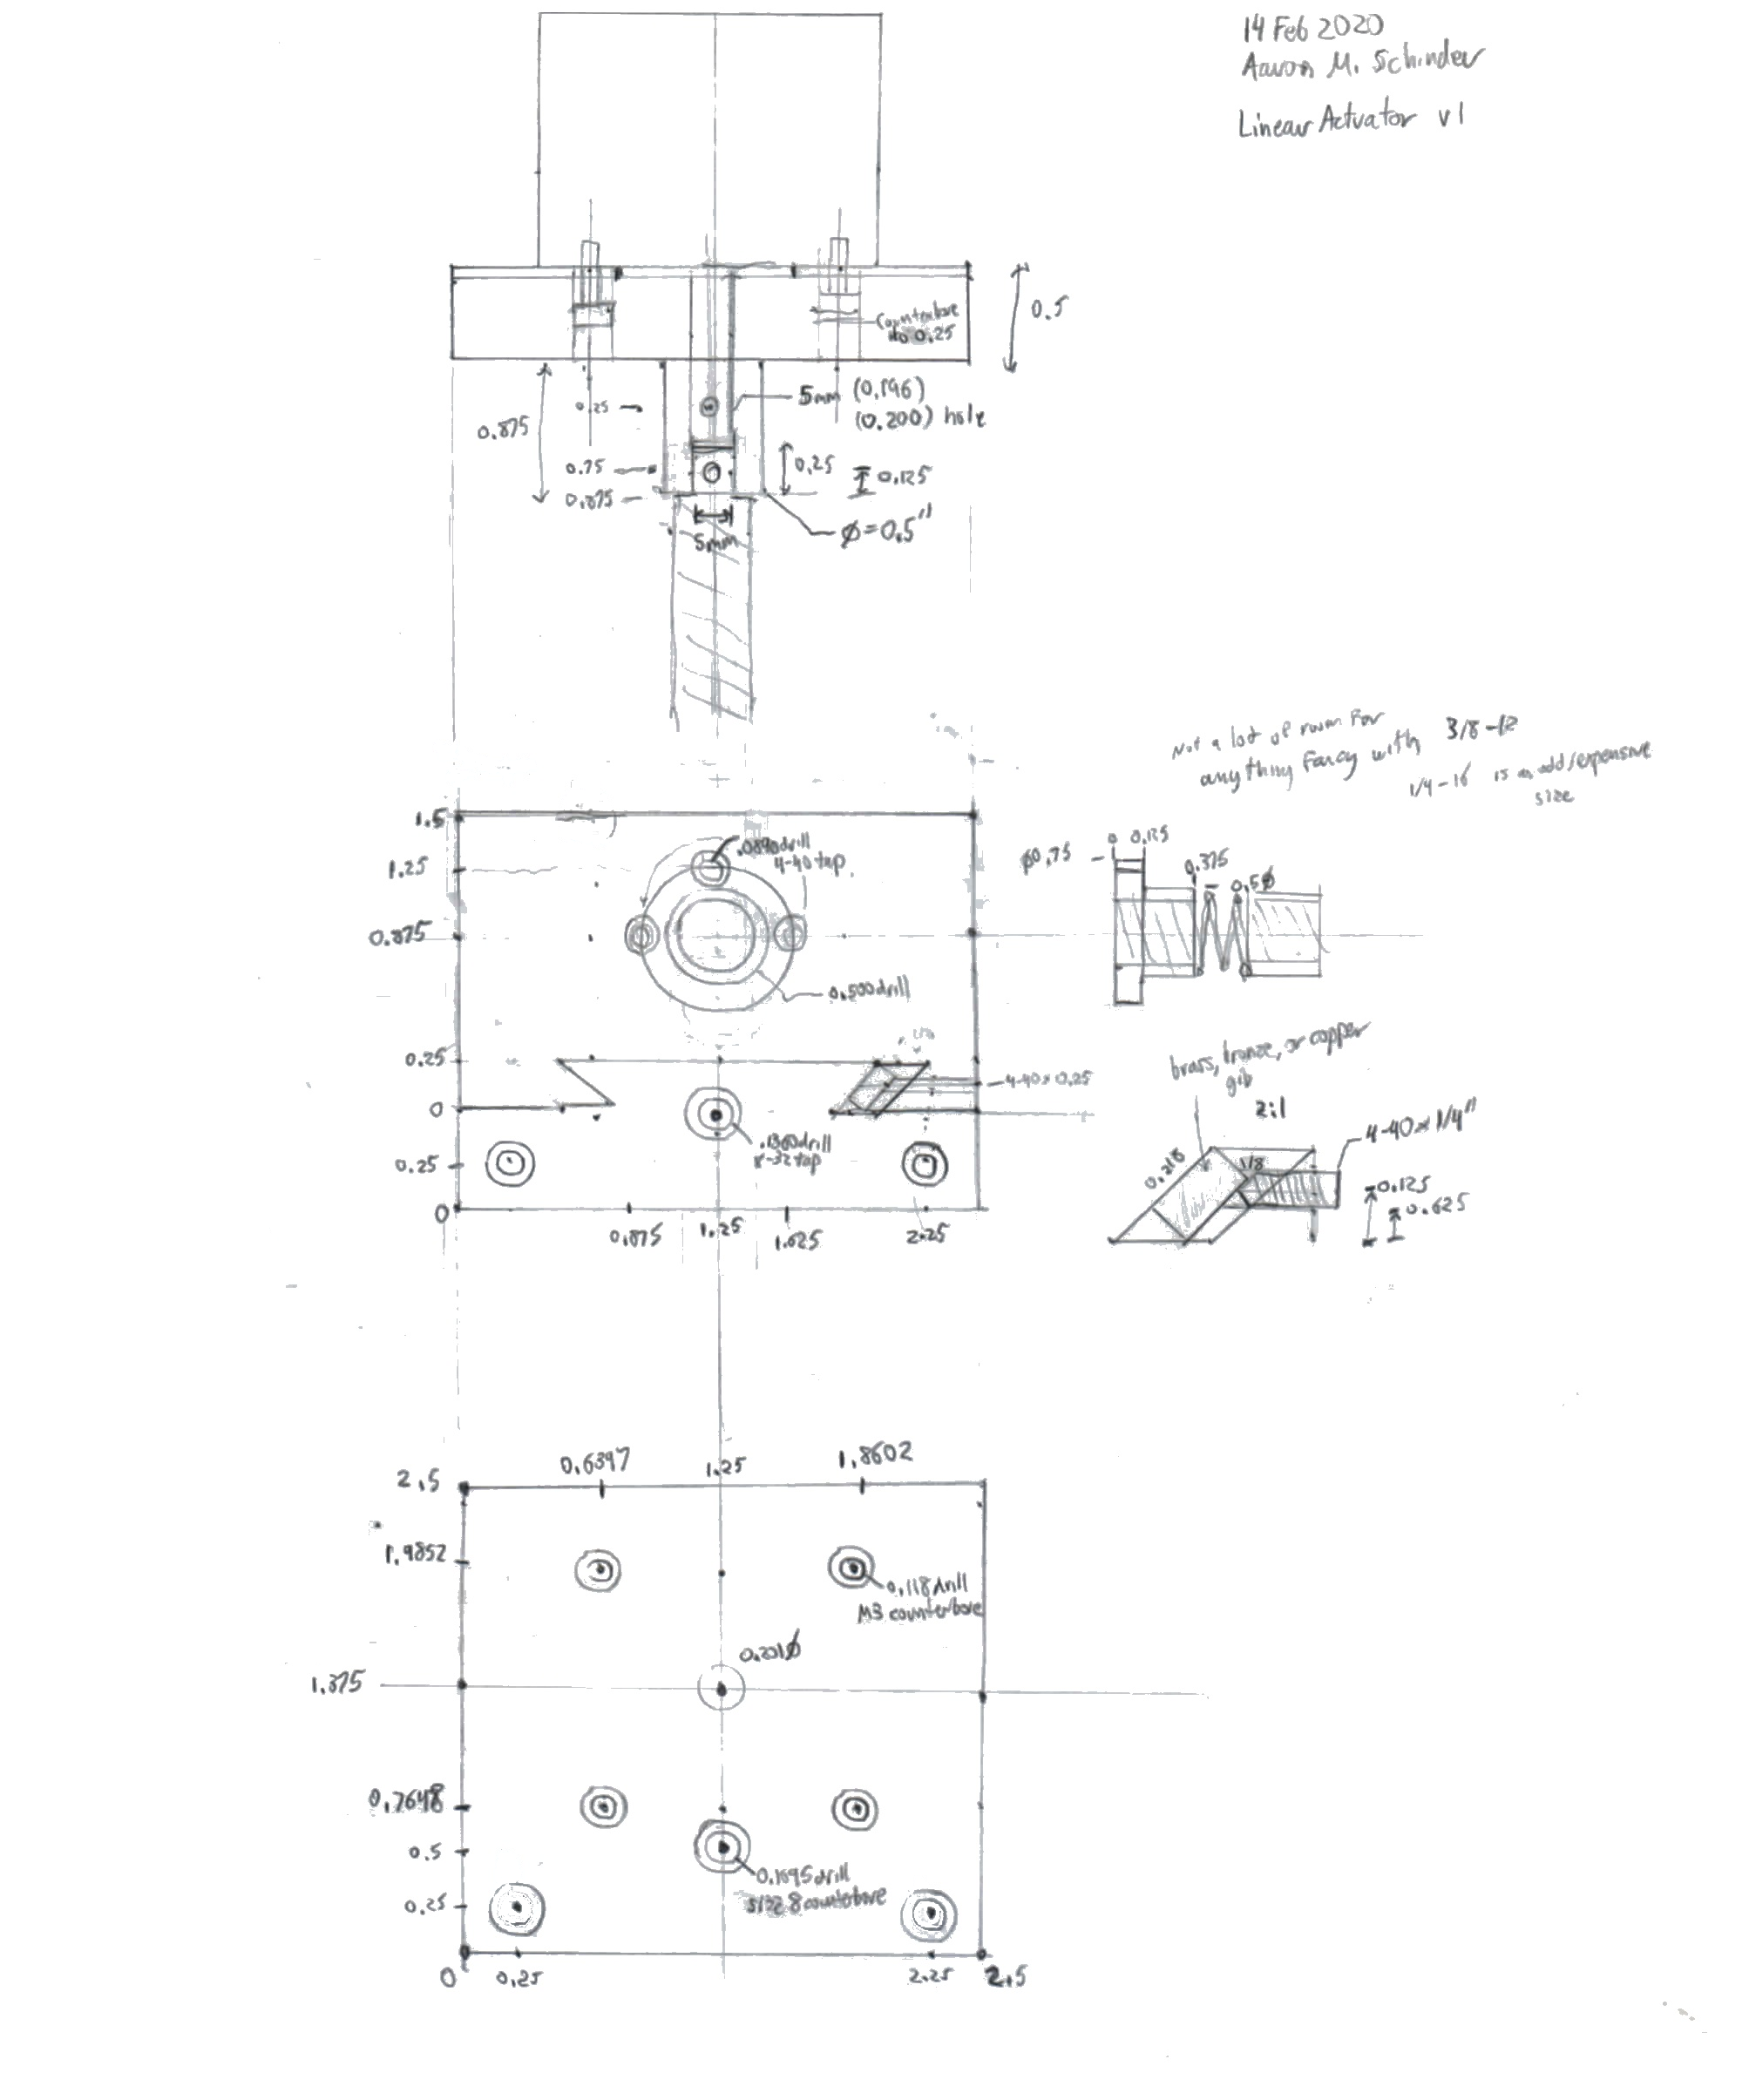
Pencil scribbles
I am not my grandfather. My grandfather could do beautifully fine hand-drawings with drafting tools. I’ve inherited this old map of his alma-mater, Tri-State College done by him during a course on engineering drawing (will include eventually). Thomas French, Engineering Drawing – it was tucked into his textbook.
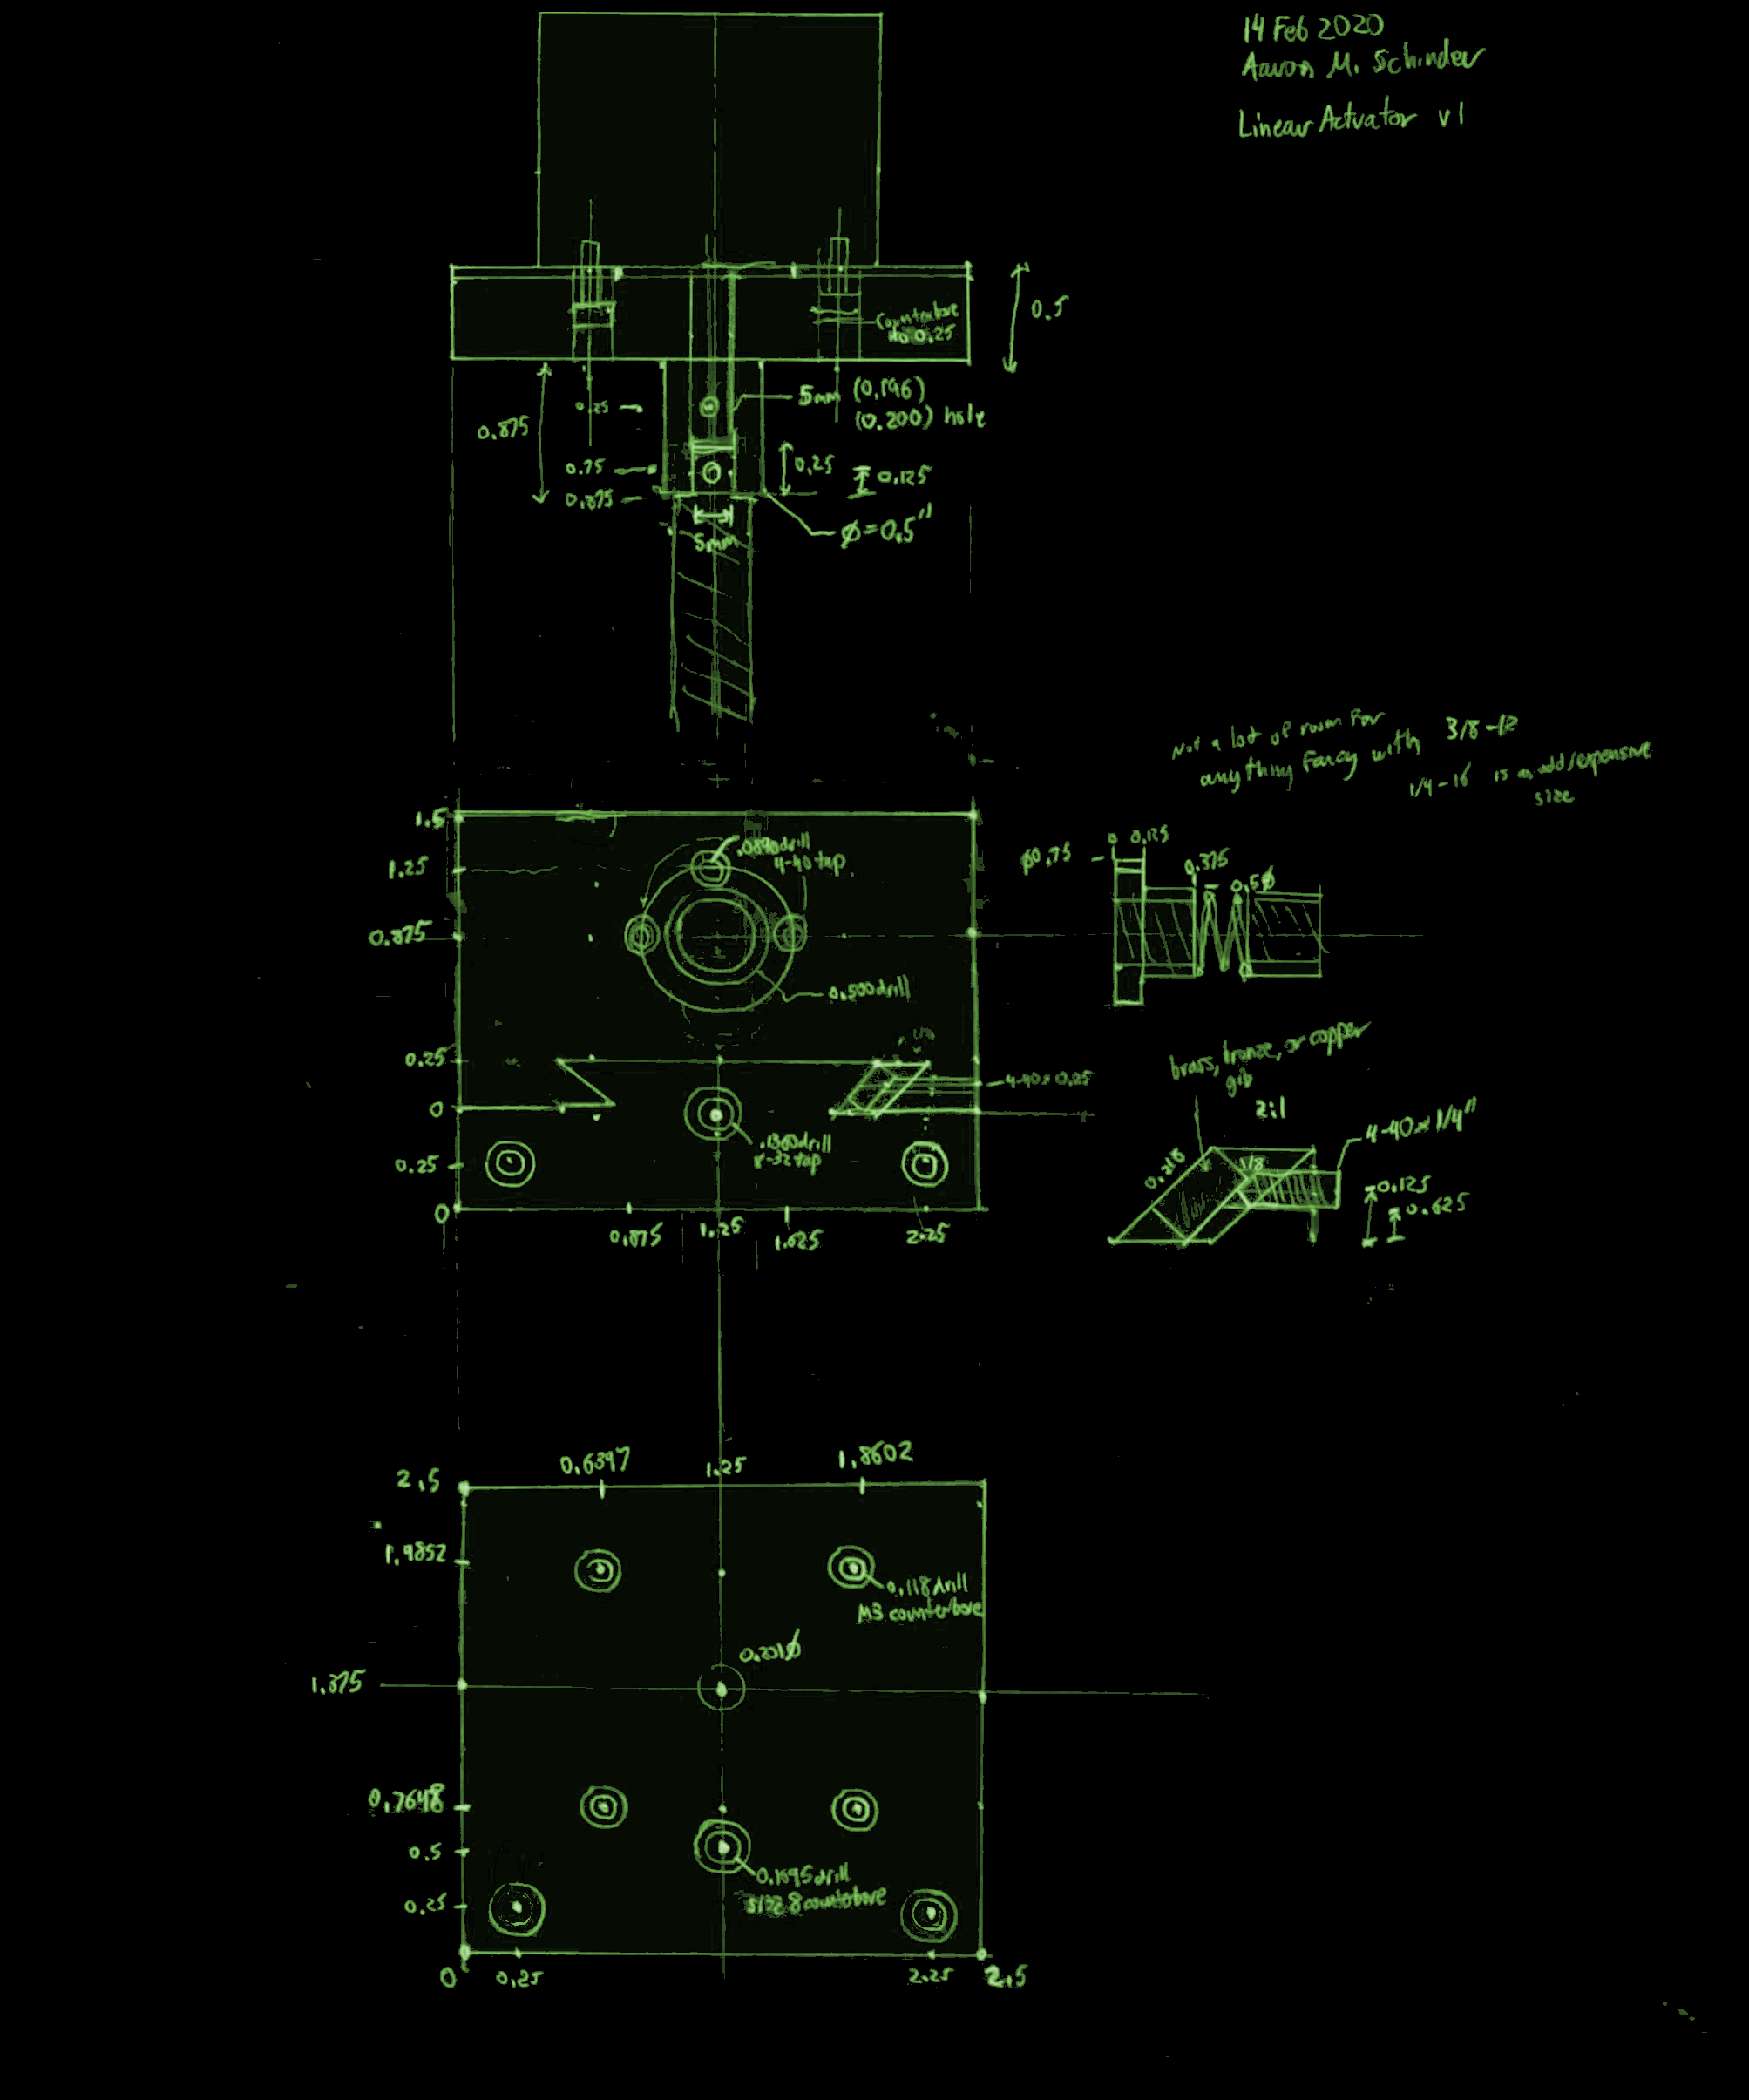
Hand drawings are useful: They’re faster than CAD when you’re still trying to figure things out, and may be entirely sufficient to plan out a part. Here is that hand-drawing cleaned up and colorized for visual interest.
The big idea
Anyway, this was the plan. I ordered a bunch of stock parts from McMaster, I made one attempt last week to cut the dovetail slide from a piece of aluminum. I figured, aluminum is softer. I can practice on it without blowing up my tools. That worked until I attempted to use the dovetail cutter. Advancing about 50 thousandths per step (way too fast), without using adequate lubricant (Dad suggests WD-40 when cutting aluminum. *Not* when cutting steel – then it would carbonize and work-harden the part.), I ended up blowing up the dovetail cutter in my face.
Aluminum doorstop that also handily stabs you
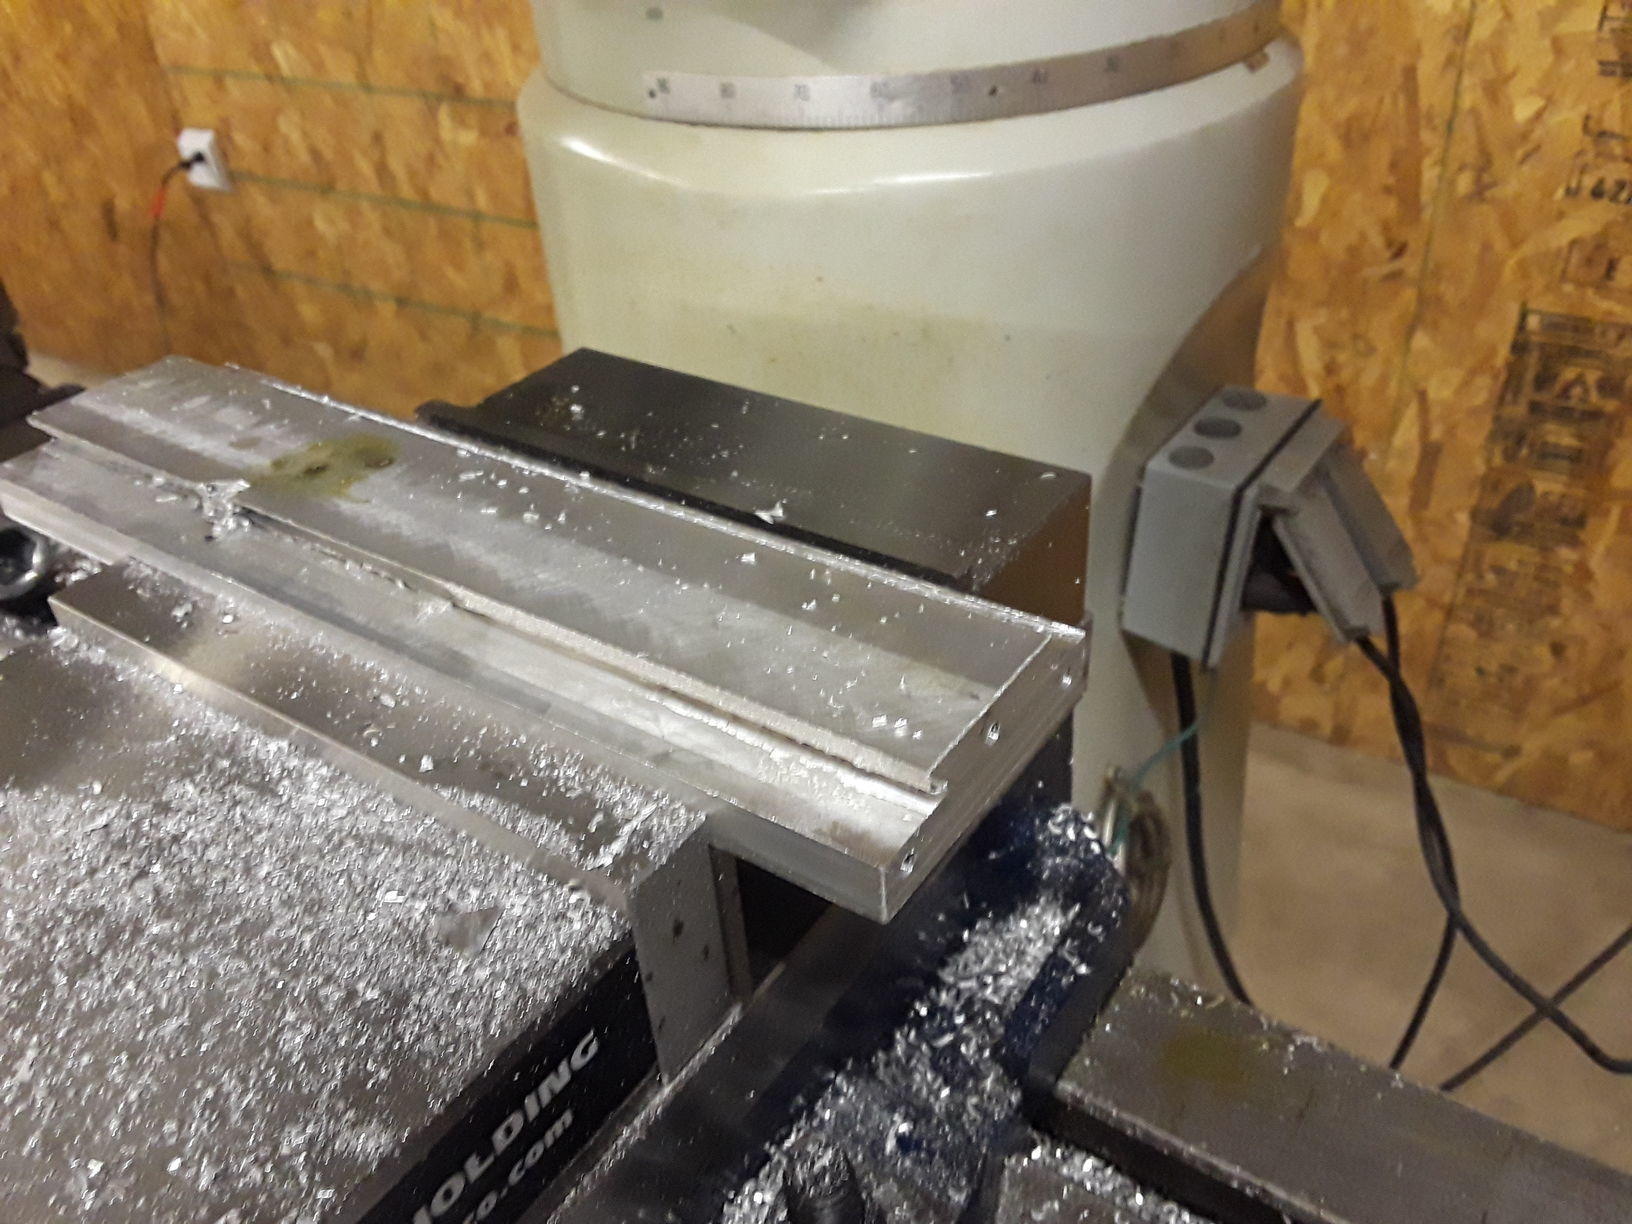
I decided, since getting the part to that state took 5 hours, to bite the bullet and just do it in steel this time. 5 hours of end milling and a nautical ton (it’s an English unit, honest!) of chips later, I had the slide squared and the square-cuts done with nice surface finish. Can’t feel any roughness with my fingernail (the fingernail test).
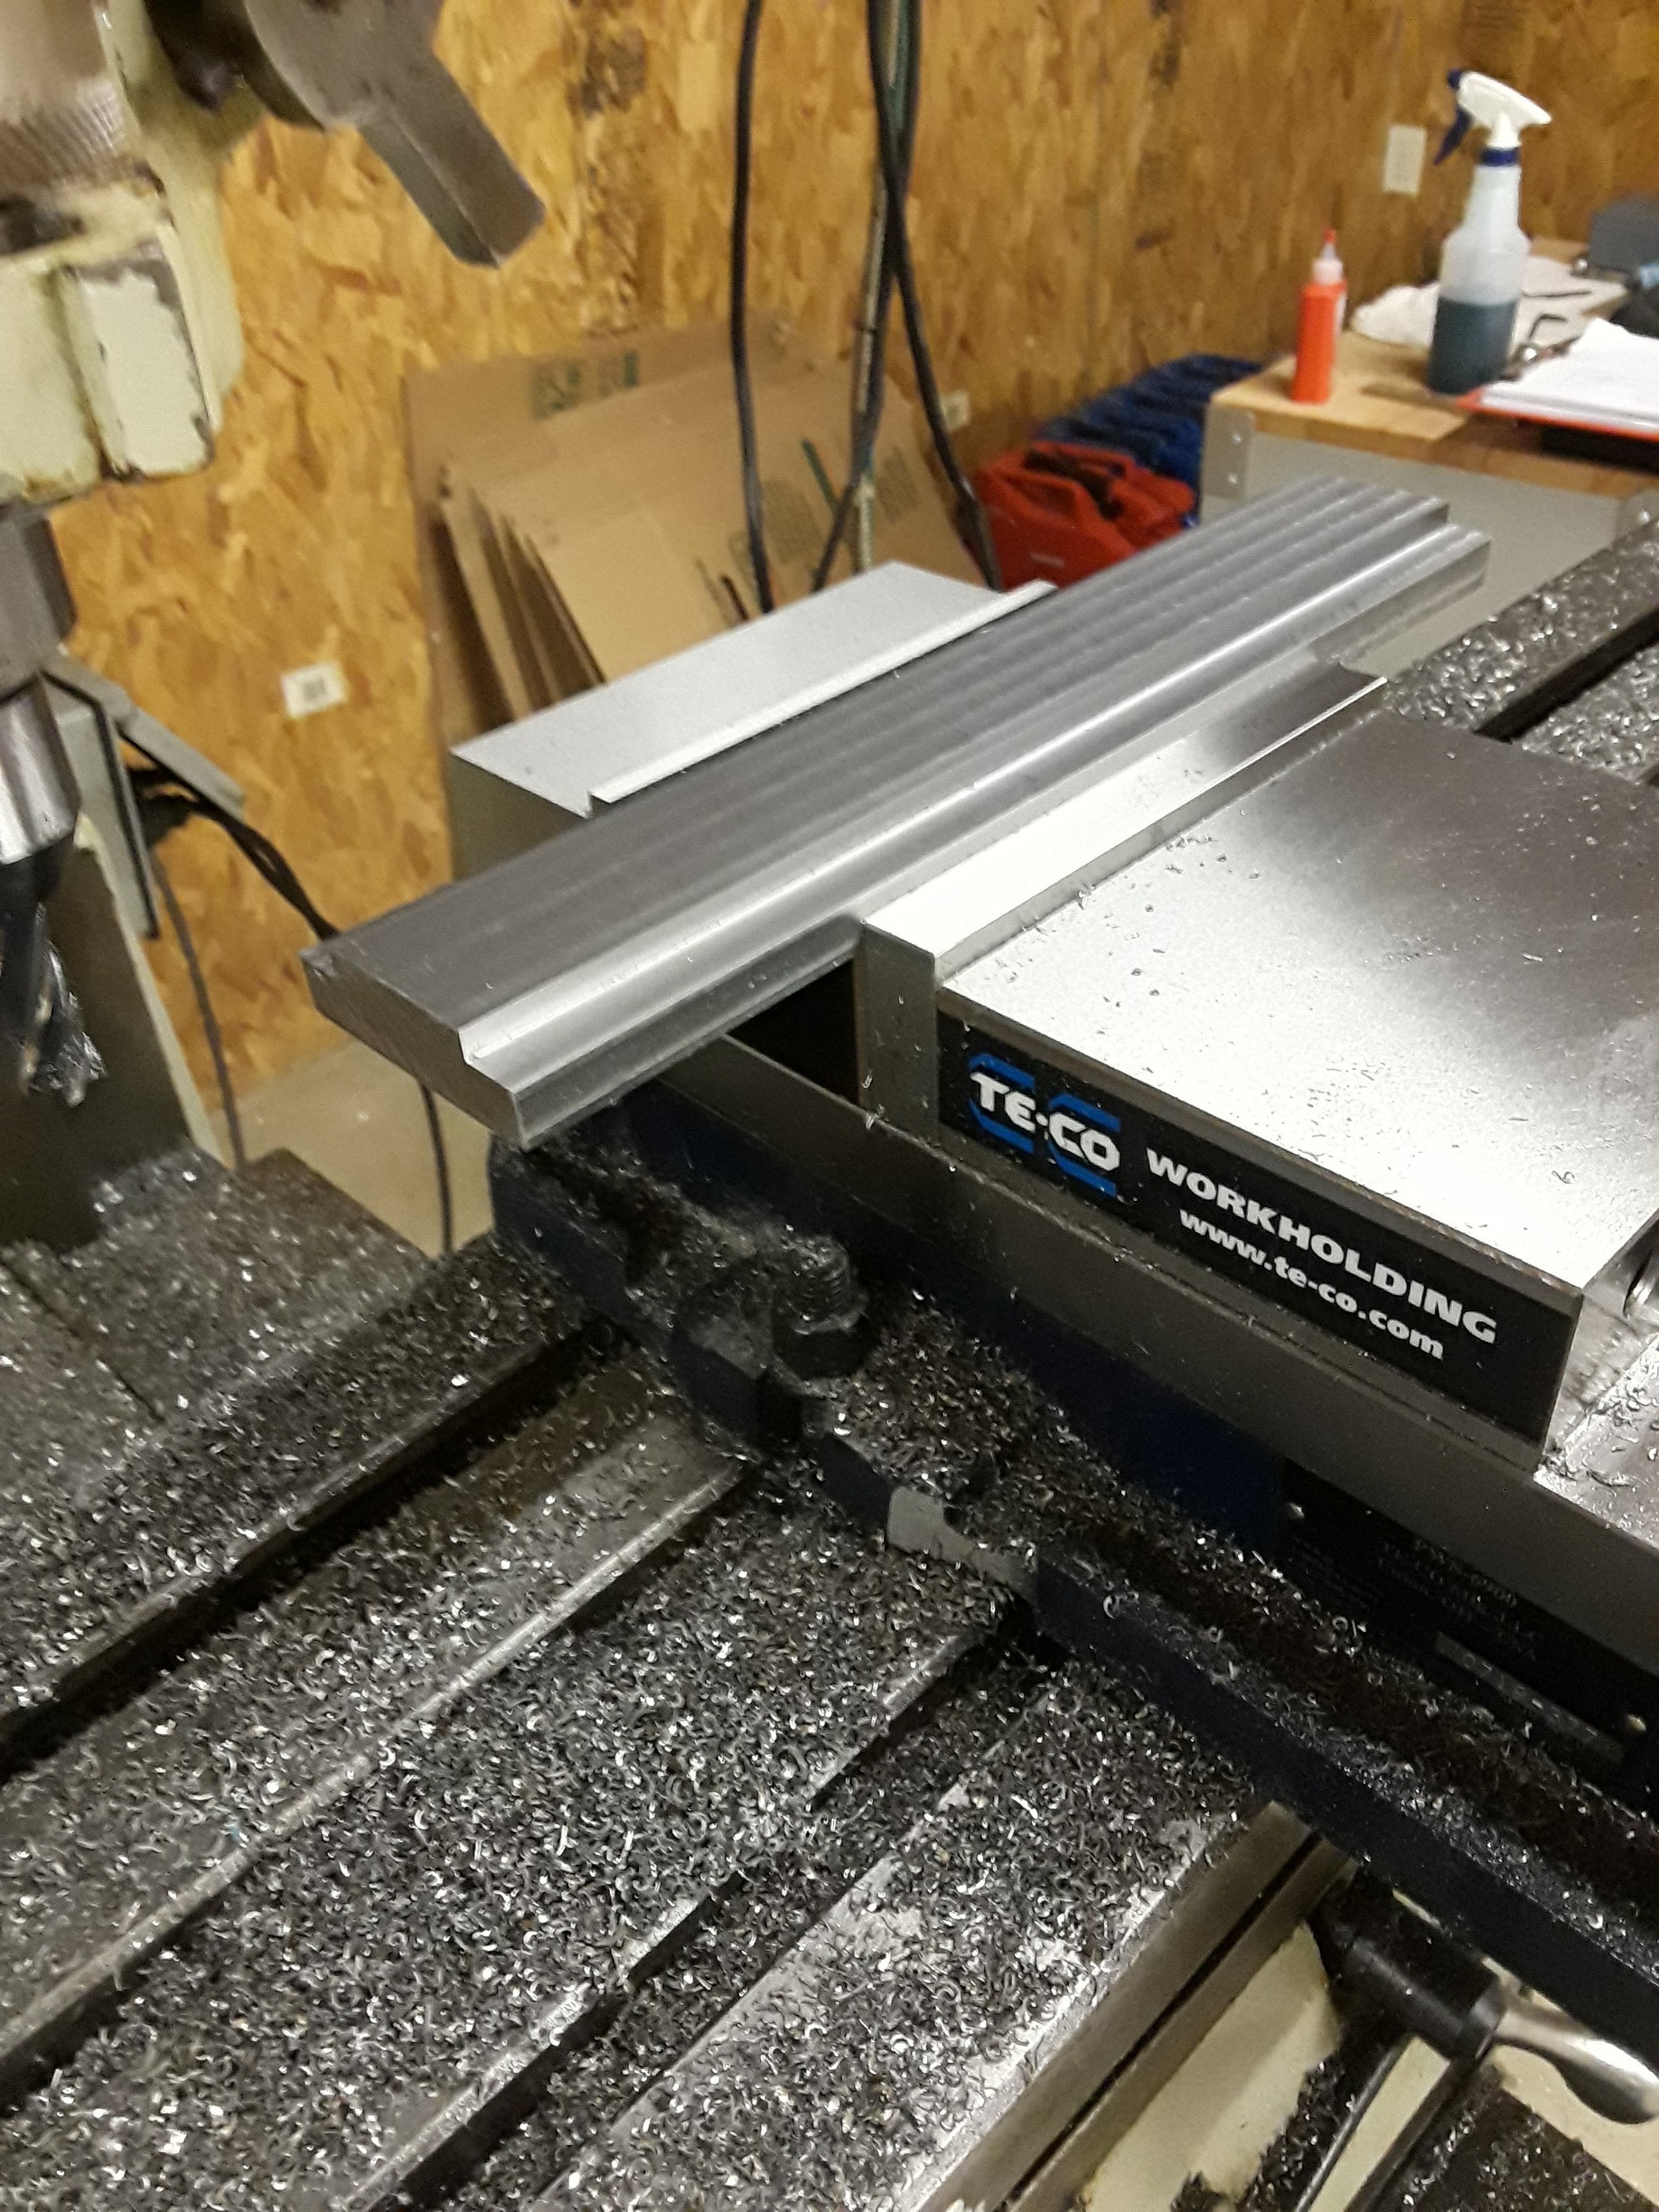
Beautifully squared piece of steel, ready for wrecking
I painted some Dykem blue layout fluid on the corner in an attempt to see my cuts.
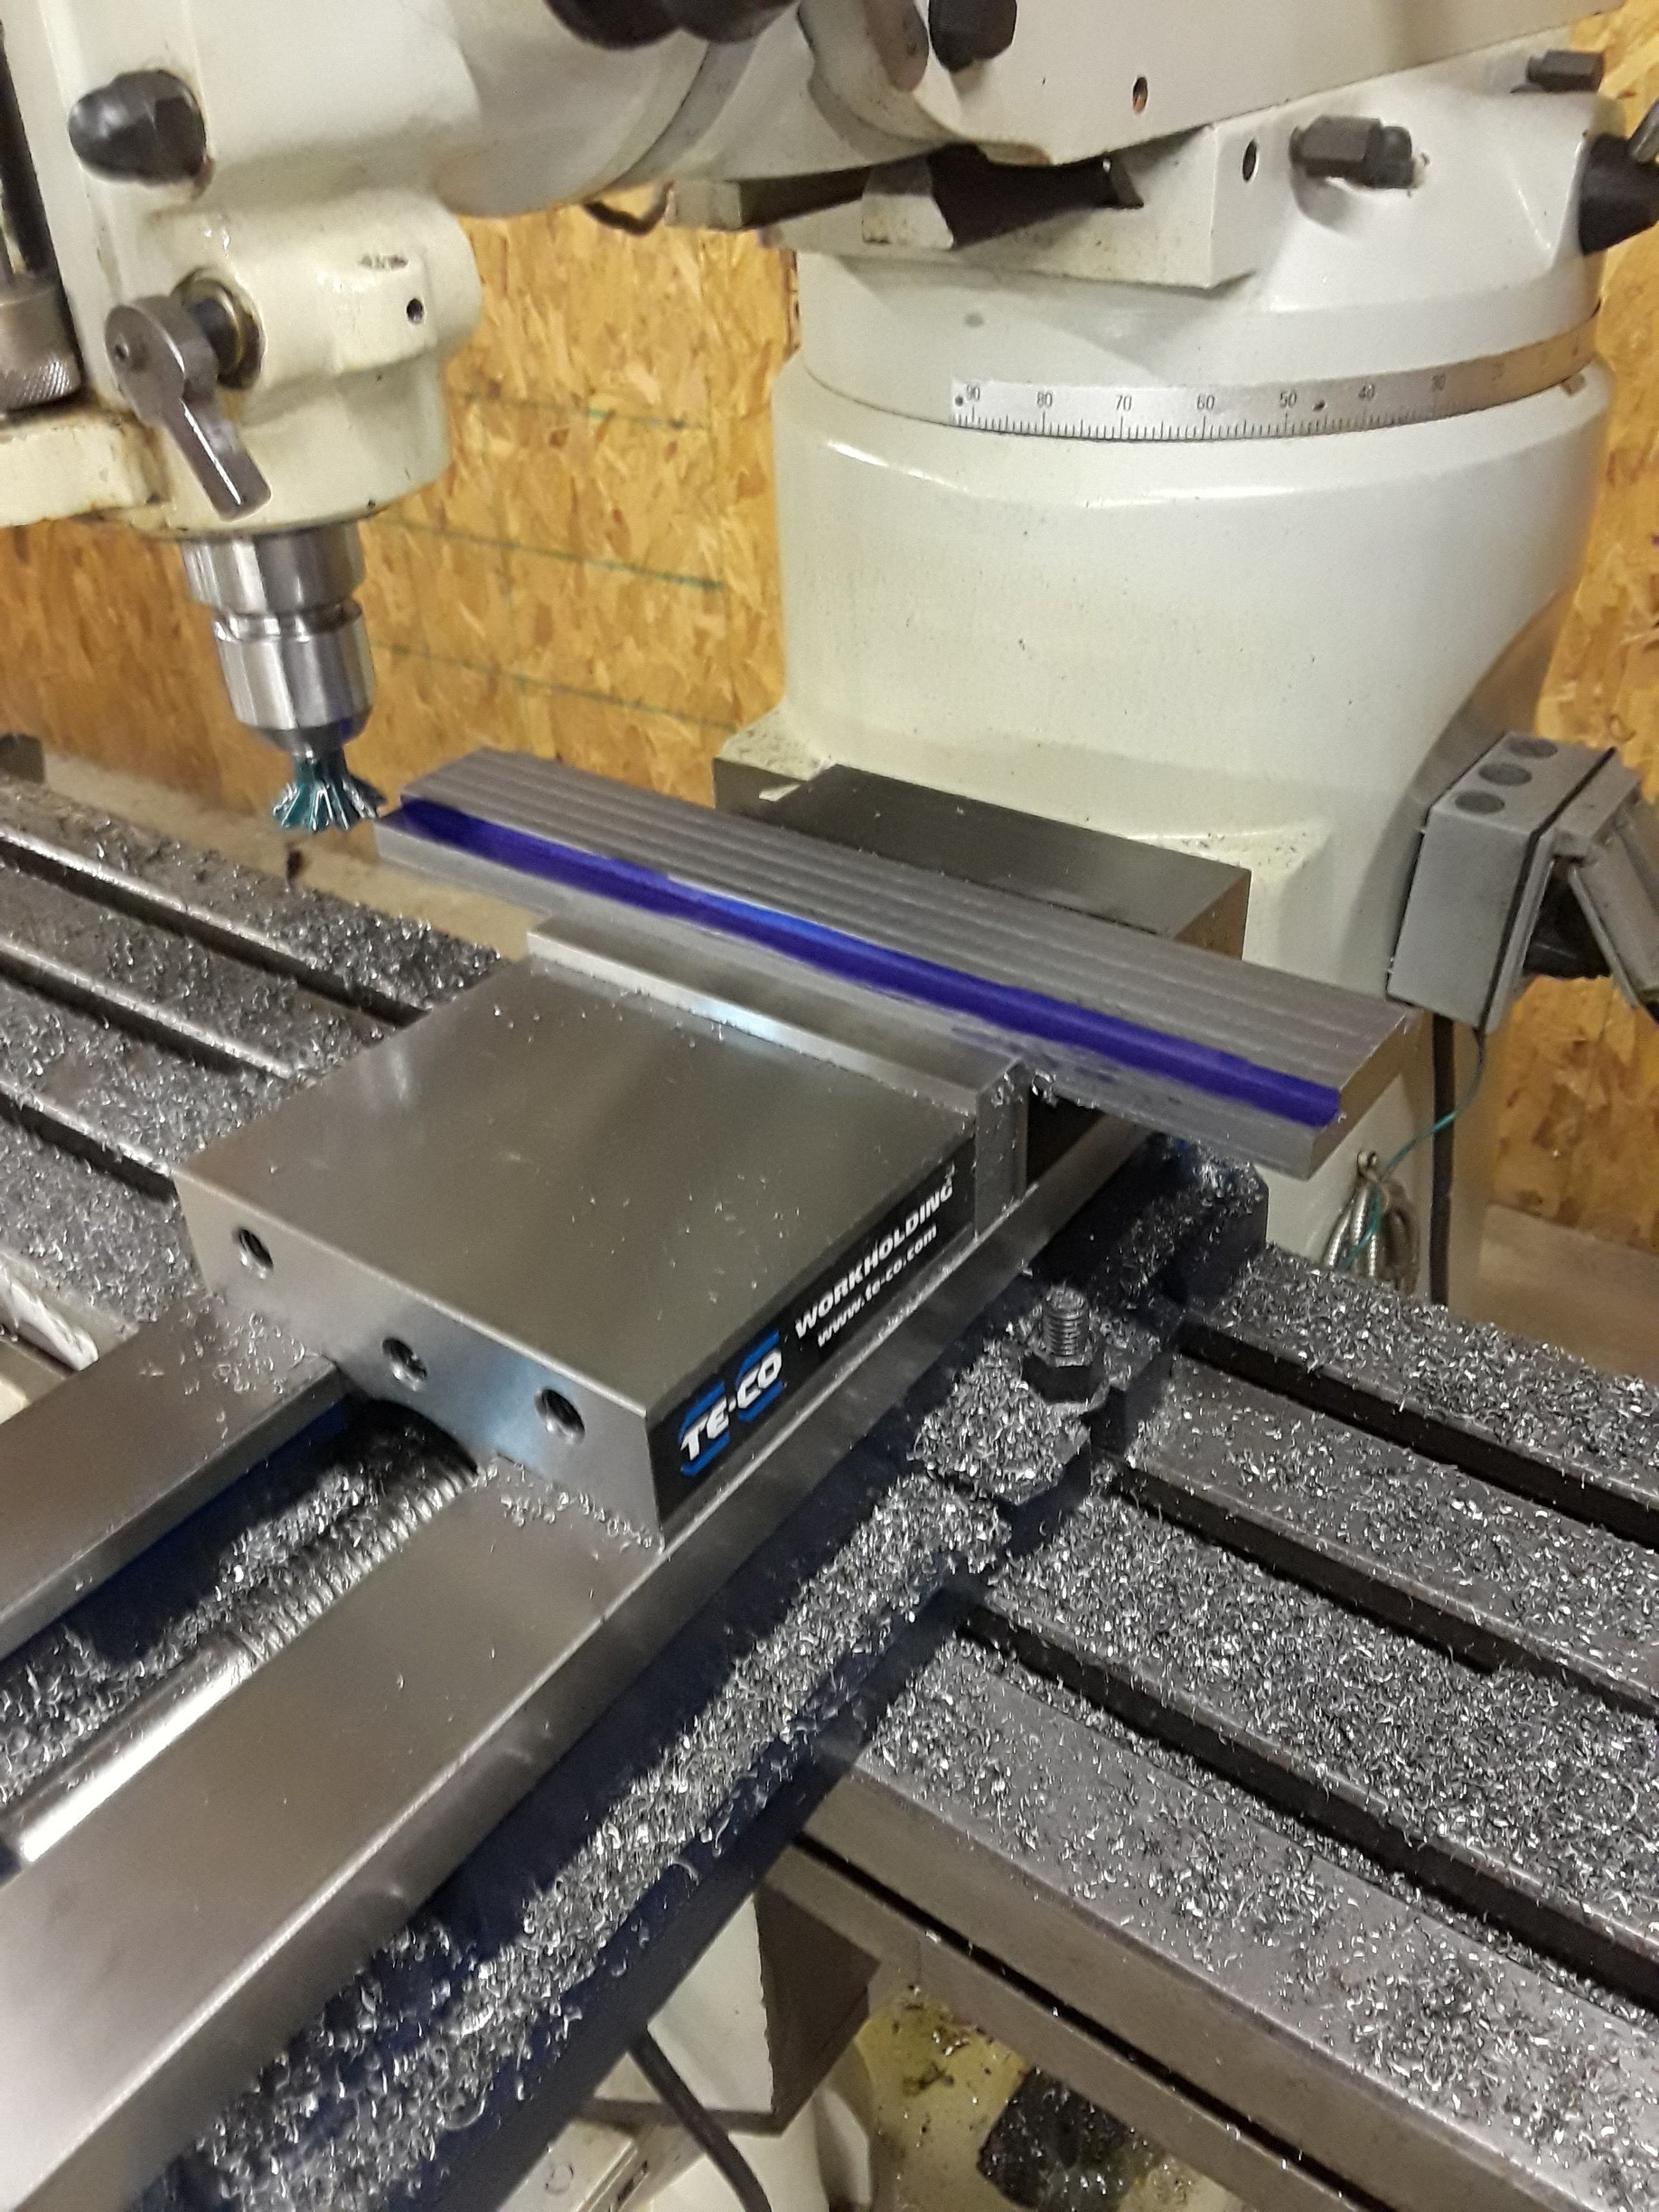
The wax goop on the tool was difficult to pry off. Tools are often dipped in this waxy crud to prevent corrosion. I managed to get it off by submerging the tool in a pot of boiling water – this worked and allowed me to easily remove the wax, which is important when attempting to get the tool into a precise starting position.
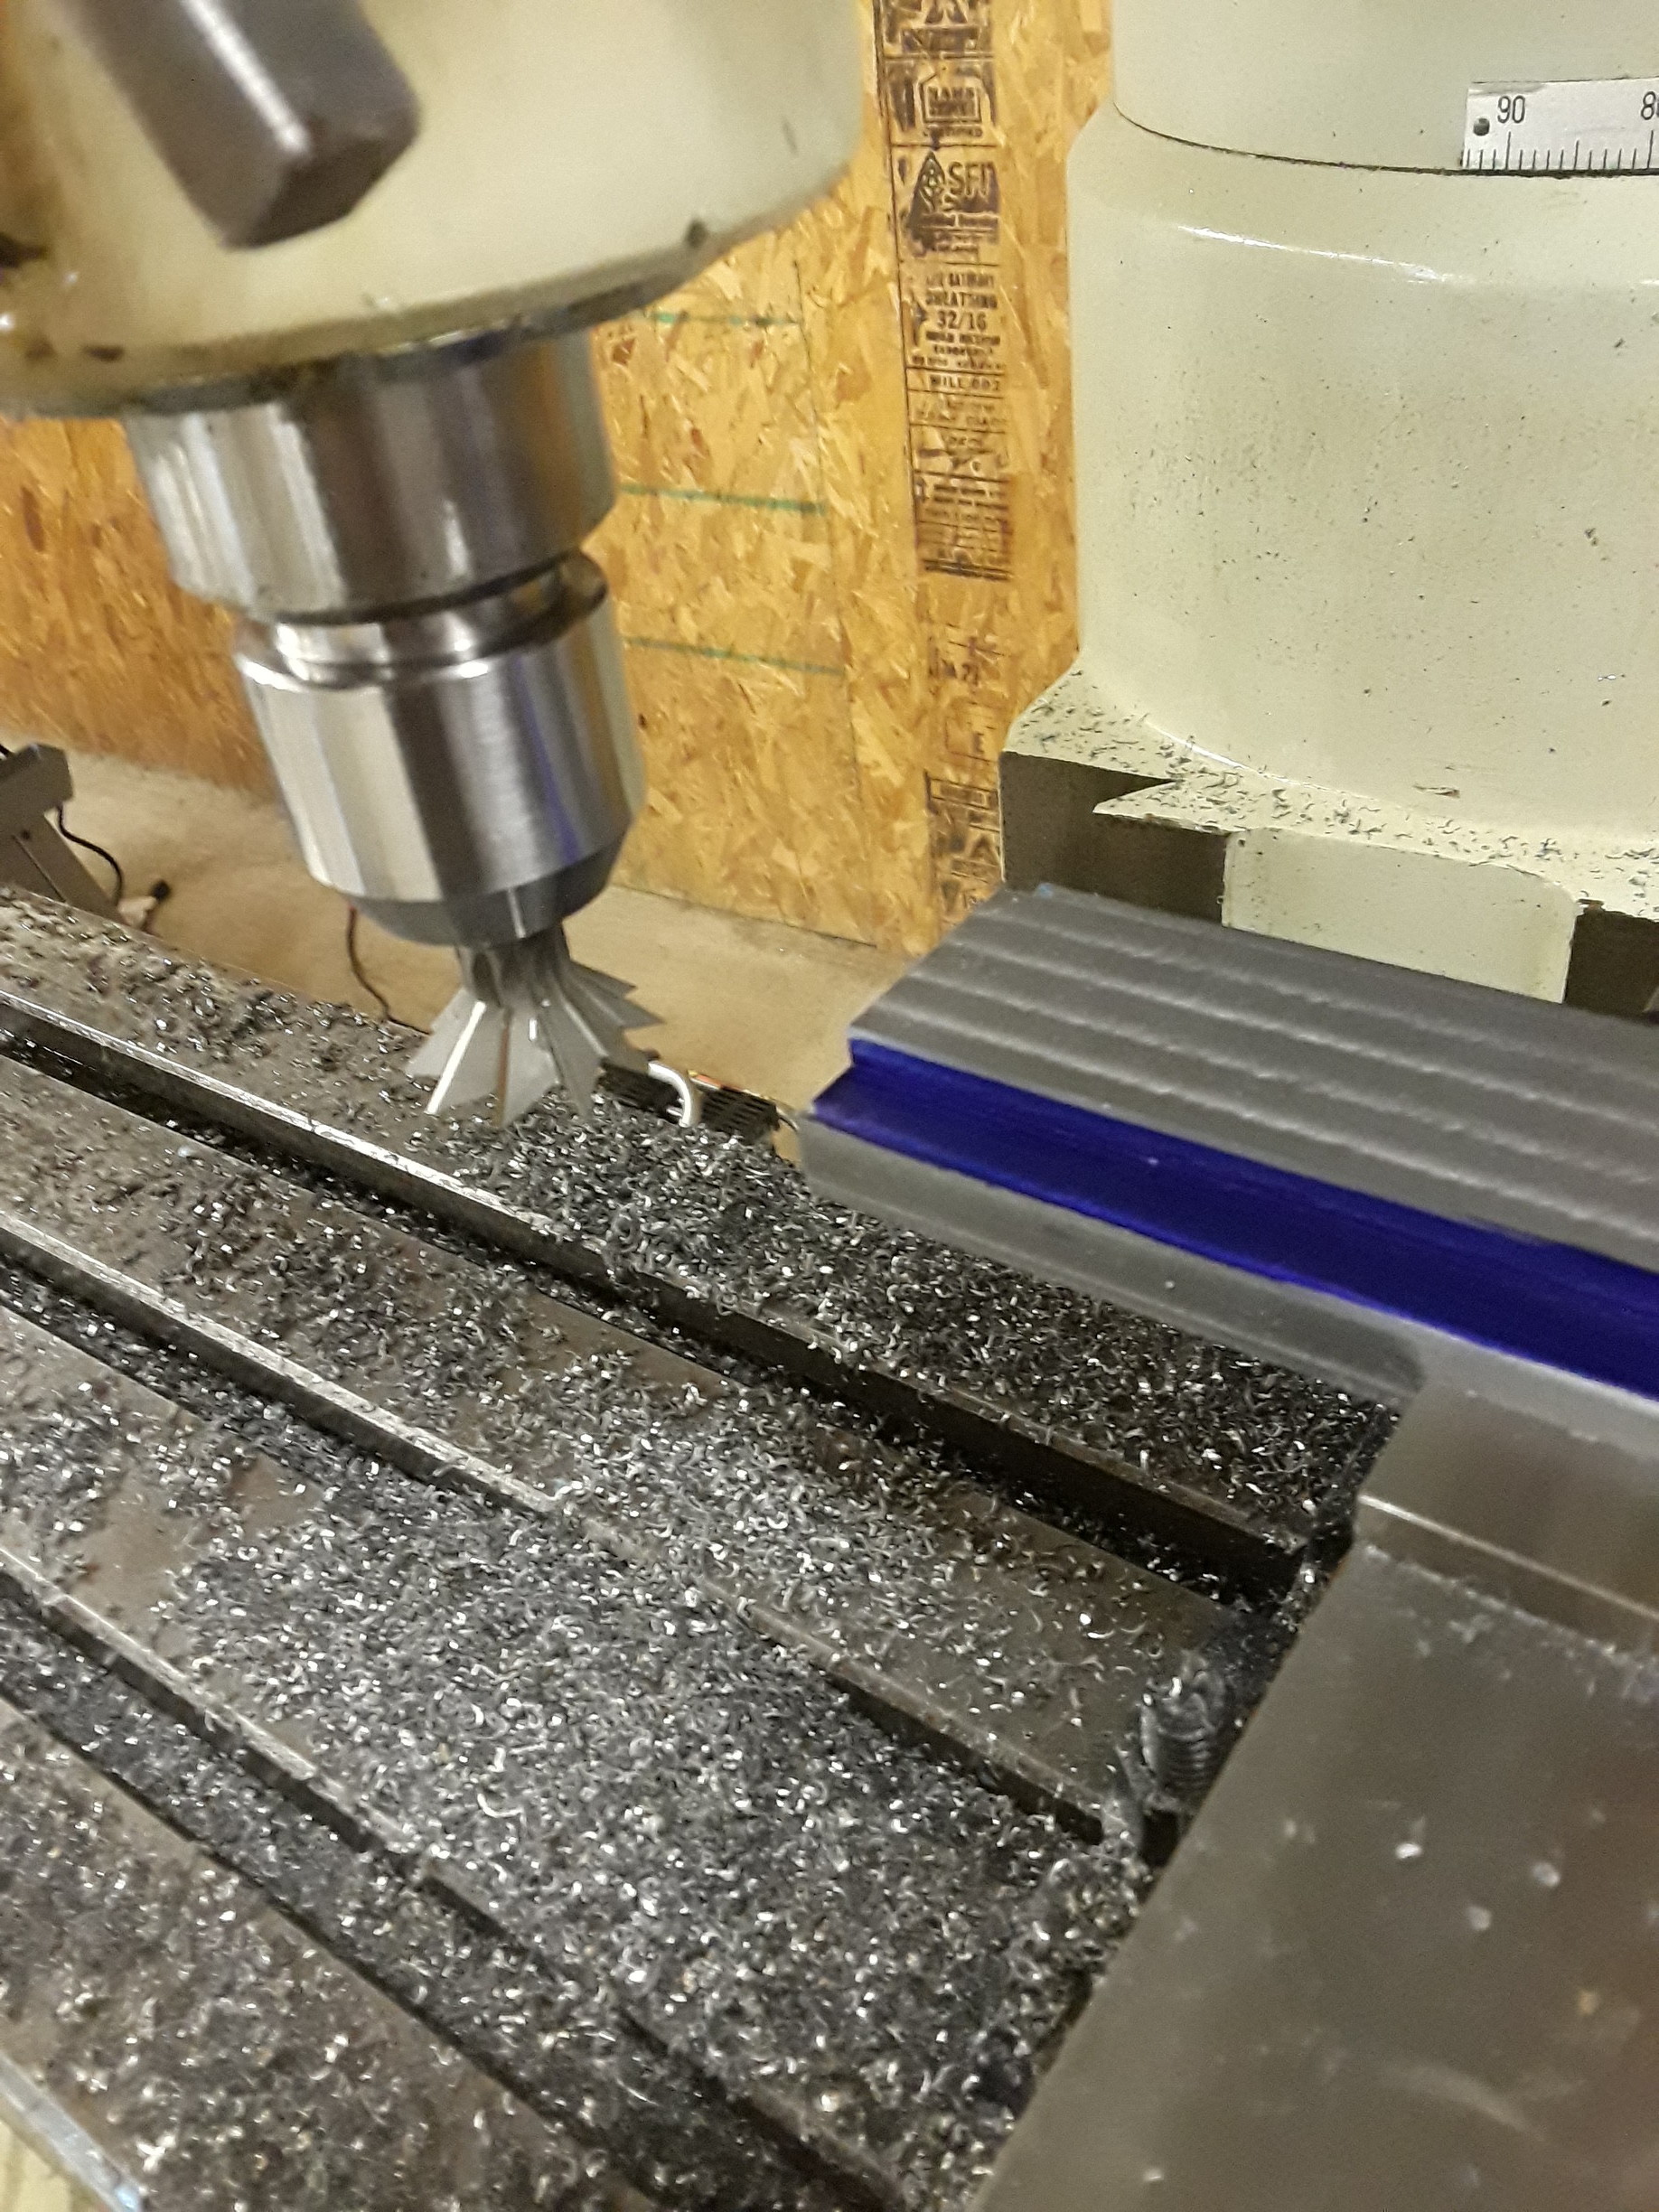
This shows the tool ready to cut. This time I was paranoid, listened very carefully to the horrible noises the cutter made as I advanced, and probably saved myself from a blowup at the very end. I advanced about 5 thousandths per step towards the end, and only about 0.2200 of my planned 0.2500. On the last cut the tool made a horrible racket on the last inch of the cut. On attempting to start the back-side, the tool wouldn’t cut at all. It had dulled itself fairly quickly.

It was a high-speed steel (as opposed to the cobalt steel) 45 degree, 1 3/8″ diameter dovetail cutter from McMaster Carr. (Not sure if I recommend them – they dull too fast.) I’m waiting on a new cutter to finish the job, and some carbide inserts for a 60 degree insert dovetail cutter from Dorian Tool by way of MSC.
One random trick that I had heard about watching youtube videos of people doing far more intricate things: Apparently when cutting steel, you can pay attention to the color of the chips. Straw-yellow means that the chips are getting somewhat hot as you are cutting. If they start turning blue, it means you are work-hardening the part and generating too much heat, and need to proceed (with more coolant, less agressively, at lower speeds).
1:36 am, March 1, 2021SiG /
The origin of precision is a fascinating study itself. There’s a channel on YouTube called Machine Thinking that has done several videos on it.
https://youtu.be/gNRnrn5DE58 as a starting point.
Consider something like a measurement tool; say a pair of vernier calipers. How do you calibrate them without calibration tools like gauge blocks? How do you calibrate the gauge block before they existed? A clear “chicken and the egg” problem.
I’m hung up at your “stepping 5 thousandths per step”. On my small mill, I use leadscrews that are .050 per turn. With a 200 turn stepper motor, that’s .00025 per step. I use microstepping, which is done for smoothness of motion, not the pure accuracy you get, but divide that by another factor of 8 for 8 microsteps per step (1600 steps in .050). I use NEMA23 motors that are 400 in-oz torque and the machine won’t go over about 15 IPM.
Most programs talk in terms of inches per minute, IPM. I can’t even give you a ballpark number without details on the tool, horsepower of the machine and more. If you don’t have a feeds and speeds calculator, CNCCookbook is the one I use. They have an arrangement that if your machine is 1 HP or less, you may use it indefinitely. I paid for one year back around 2016. Since my big mill is 1 HP and the Sherline is ~ 1/10 HP, I’ll never need to buy again.
The big mill uses metric ballscrews and cuts considerably faster. I’ve cut aluminum at over 30 IPM on it.
1:23 pm, March 16, 2021Kim /
I’m pleased you are writing again in your blog.